This is a sponsored post. I have been compensated by product or payment. All opinions and experiences are truthful and my own. This post contains paid links.
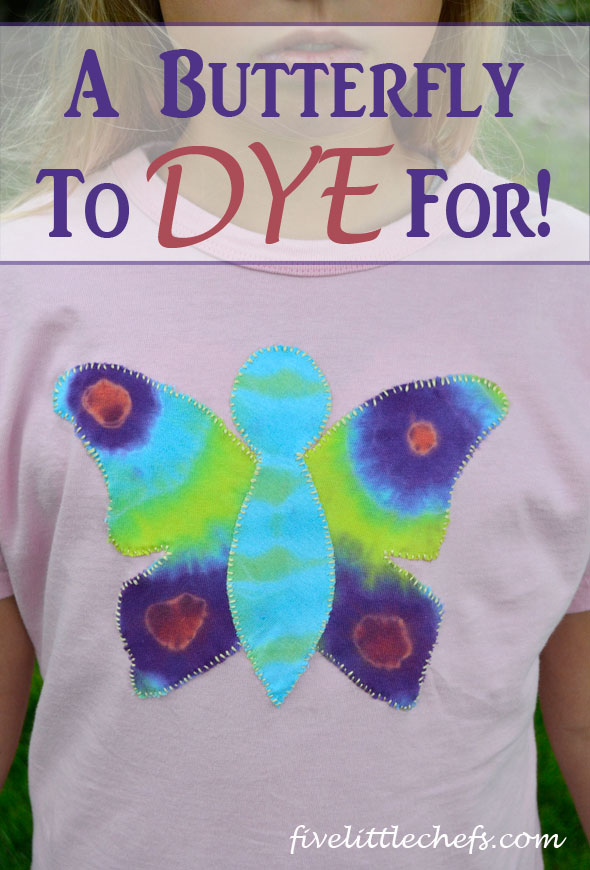
School has been in for a month now, because we are on year round school. It seems like we are always worried about school clothes for one reason or another. With 5 kids I have plenty of shirts that look nice except for that stain on the front right where everyone can see it. I hate to get rid of a shirt like this so I let my kids wear them as play shirts at home. Then I got to thinking, Tie Dye Your Summer would be perfect. I cover the holes in their pants with patches, surely I can make a cute design for a shirt. Then I came up with the tie dye butterfly shirt. It is a lot of work for one stain, it would be easier to tie dye the entire shirt but I like that only part of the shirt is tie dyed.
Supplies needed:
- Large One-Step Tie-Dye Kit (everything you need is in each kit)
- 1 large white t-shirt
- 1 stained (or not) t-shirt to embellish
- black garbage bag
- small zip top bags
- heat ‘n bond
- DMC thread, color of your choice
- hand sewing needle
- scissors
- pencil
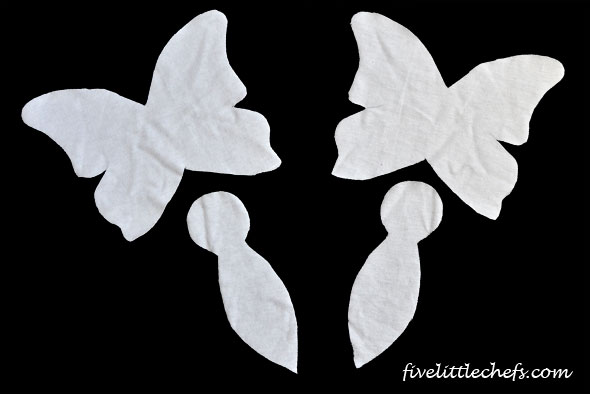
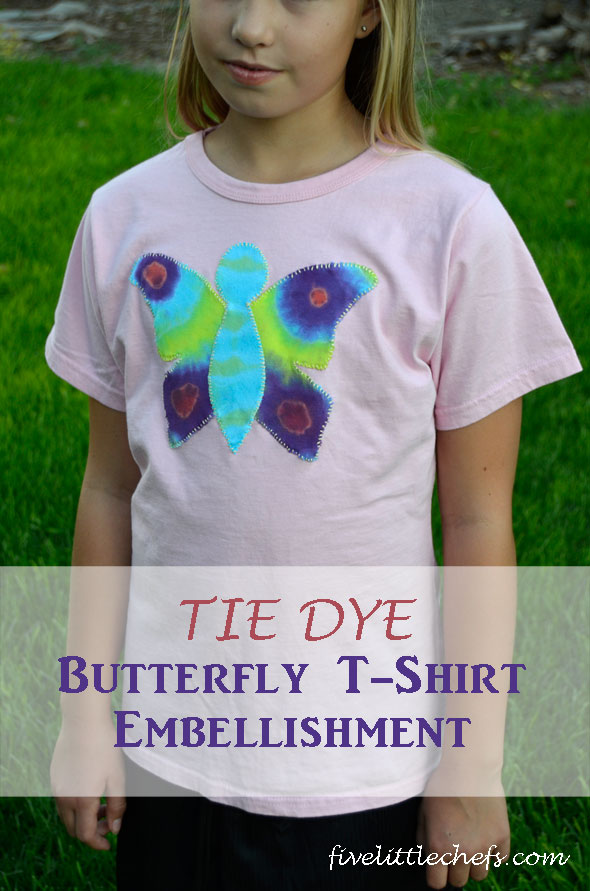
I found a butterfly image I liked and printed it at full page size on regular paper. I cut out the two parts (wings and body). I then placed them on top of a shirt then traced around them with a pencil. Next I cut out the two parts. I was left with two butterfly wings and two bodies.
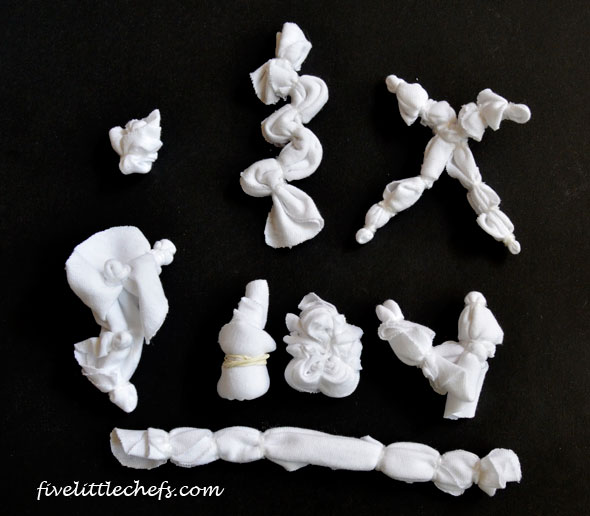
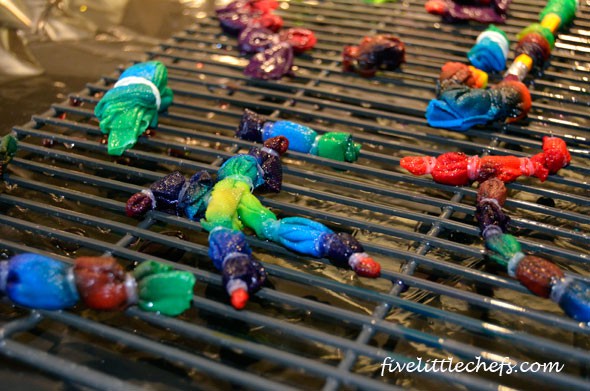
Next I folded and pinched and gathered the two shapes, separately to ready them for the tie dye application. At first I followed the directions that came with the Tulip Tie Dye kit. Some of the designs I really wanted to do like the double swirl were hard to do with a small piece of material. I then choose to fold and pinch and gather where I wanted the design to be in relation to the wings and body because I understood the concept; whatever is gathered in each section will be the same color.
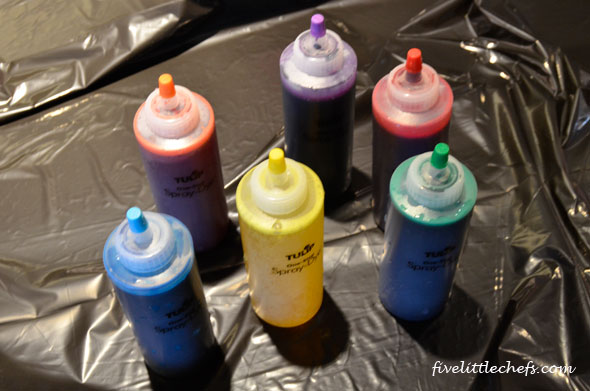
 To prepare the surface I laid out a garbage bag on the counter to catch and drips or splatters. I used a glass dish with a drying rack on top to let the dye drip down and collect in the dish. I put on the gloves that come in the package and then took everything to the kitchen sink. When your material is ready that is when you mix the dye because it needs to be used within 45 minutes. The bottles come with the dye already in them. It was easy to add water and shake. I was happy I mixed and shook the bottles over the sink because some of the dye did escape from a couple of the bottles. It was easy to clean up in the sink and easy to wash my gloves off before filling the next bottle.
Time to apply the dye! With gloves and an apron on the fun began! The difficulty was the fabric pieces are so small it took some practice to squeeze out only a small amount so as not to muddle the colors. I would suggest dampening the fabric just a bit because the dye will soak in easier. After the dying was completed I very carefully placed each piece in a small zip top bag and let it rest for the 6-8 hours as suggested in the directions.
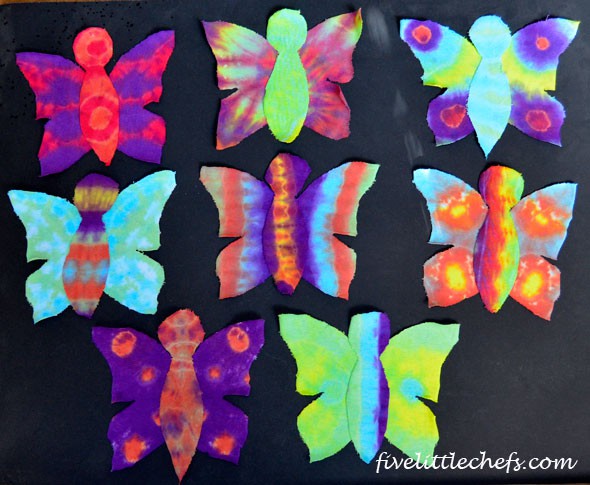
After the waiting time I put the gloves back on and rinsed each part to get rid of the excess dye. Then I threw everything in the washing machine, yes together. I hoped it wouldn’t ruin each design but I did not want to launder every little part separately. I took a chance and amazingly it worked…mostly. If there were any white parts they came out light blue, but that was still fine by me. I mixed and matched the wings and the bodies. Some designs came out better then others, but overall for the first time tie dying anything I was happy with the result!
The next step is to apply the butterfly to the shirt. In order to make this process a little easier on myself I cut out the same two patterns with heat n bond. I trimmed them down just a bit because let’s be honest, nothing was cut perfectly.
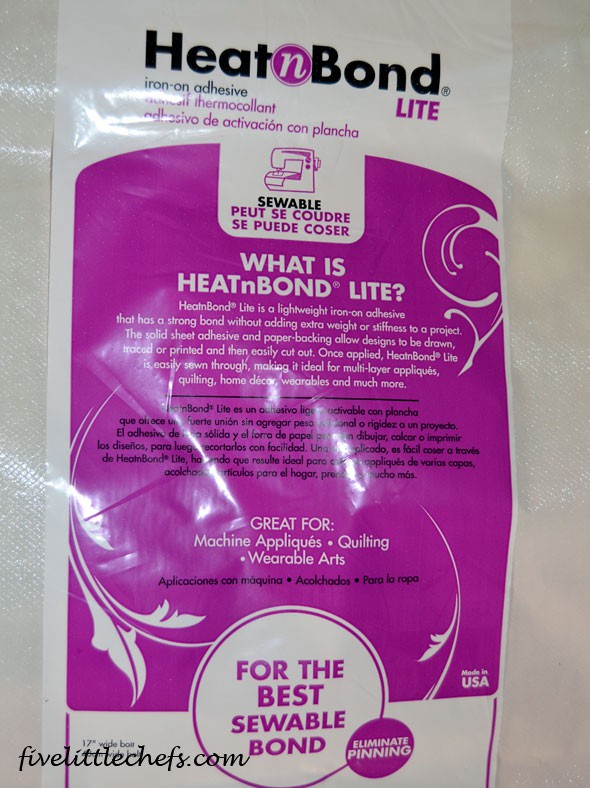
If you are not familiar with Heat n Bond it is sandwiched between two pieces of fabric to “glue” them together. To do that I ironed the heat n bond to the backside of the two butterfly pieces. I then peeled off the paper backing and placed the two pieces separately on the shirt and ironed it in place. Now the butterfly is adhered to the shirt.
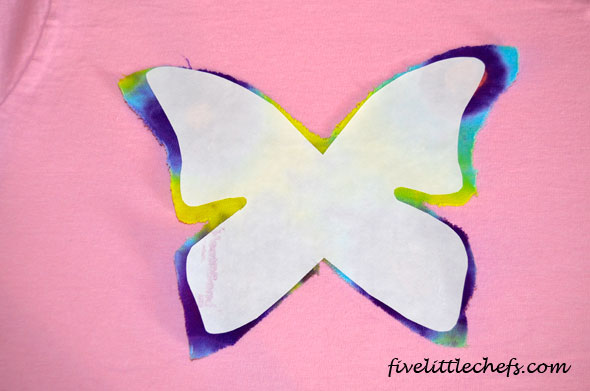
The butterfly needs a little reinforcement to stay in its place so I used some DMC thread and stitched around both pieces. I used a hoop to make it easier. Sewing did take some time but it is a perfect thing to do while hanging out with some girl friends all sewing together.

I love how this shirt turned out and my girls do too! Being that this is the first time I have used tie dye I was surprised at the simple process. The hardest part was waiting and waiting wondering if it would actually turn out. At the end I realized even if something was unintended it does not look like a mistake. Tie dye is so fun and each design is completely unique.
To learn more about Tulip’s Tie Dye Your Summer watch this fun video.
For more fun ideas and tips check out Tulip Tie-Dye on Facebook, Twitter, Pinterest and their blog.
Check out more fun tie dye ideas from some blogger friendsfor even more inspiration.
1 Reply to "Tie Dye Butterfly Shirt Embellishment"
Diana Rambles January 5, 2015 (8:58 am)
I love this idea! Super cute! I’m not a hippie, but I love tie dye!