
We have been having fun with origami and paper lately. Some attempts have been successful, while others have failed miserably. If I can’t figure out the directions to teach it to my Little Chefs quickly they get bored and distracted and move on to something else. This fold-out heart card was one of our successful attempts. It was also fun because Little Chef C was immediately able to write a valentine for Grandma and Grandpa. Not only was she able to show them her creative work, but she was able to write a note. She LOVES writing notes!
I got the instructions from a book by Karen Elaine Thomas called Origami Card Craft.
You will need a double sided piece of scrapbook paper cut to 10″ x 10″. While this craft was fairly easy for Little Chef C to complete, using scrapbook paper vs. origami paper was a little more difficult to get the corners right and the folds deep because of the thickness of the paper.

Step 1: My final heart is going to be pink so I place the pink side up. “Valley fold the sheet of paper in half in both diagonal directions and then unfold.” This is what your paper should look like when completed.
 Step 2: “Valley fold all 4 corners to meet in the center.” This is what your paper should look like when completed.

Step 3: “Valley fold the top and bottom corners so the points touch the outer edge.” This is what your paper should look like when completed.

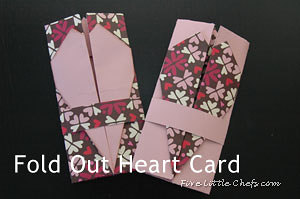
Step 4: “With the points still folded, valley fold the left and right sides to meet in the center.” This is what your paper should look like when completed.

Step 5: “Open out the sides just folded completely, so the points face left and right.” We only had one side opened when we took the picture.

Step 6: “Make the outer 2 folds on each pointed flap into mountain creases. Refold along new creases back toward the center.” Step 7: “Mountain fold the outer flaps just underneath themselves (but not all the way around the card).” Basically, just refold each flap you just unfolded to look like this.

Step 8: “Valley fold the right top layer to the left as if turning the page of a book.” This is what your paper should look like when completed.

Step 9: “Valley fold the bottom corner of the top layer over to the right to meet the crease line, then mountain fold the top layer back to the right.” This is what your paper should look like when completed.


Step 10: “Repeat steps 8 and 9 for the left.”
Step 11: “Your paper should have two angled flaps on a cupboard fold.”
Step 12: “Open out the right and left sides as shown in the diagram and cut a slit about 1 5/8″ long at the top of the outermost crease on each side. Mountain fold the little cut sections in so the outside edges line up. Turn the paper over and glue down the loose folds of the heart shape. Turn the paper over again.”


Step 13: “Mountain fold the top and bottom points underneath.”
Step 14: “Fold the sides back to the center along the existing creases.”

To make a closure: Cut a strip of paper or ribbon 1″ wide. Wrap around the completed card then glue at the closure. We had to cut a piece off because ours was too long.


If you want the heart to stand out more you can embellish it by inking the edges, or applying glitter or whatever you choose. Give it a try. Little Chef C felt a great sense of accomplishment when it was completed and she delivered her very cute homemade valentine!
Don’t forget to enter our Twist Me Pretty Giveaway! Today is the LAST day!

1 Reply to "Fold-Out Heart Card"