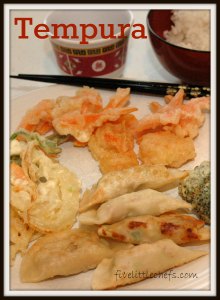
Tempura-Continuing Our Culinary Journey
Tempura was made on the same day we also made Japanese Gyoza. Tempura is something I have made for my Little Chefs however this was the first time they helped make it. This afternoon of cooking was like musical chairs. Each time I turned around one Little Chef was off playing and another one was at my side wanting to help.
First the vegetables and protein were prepared. Cut them in thin slices or "matchstick" size. We used green beans, onion, sweet potato and shrimp. The sweet potato ...
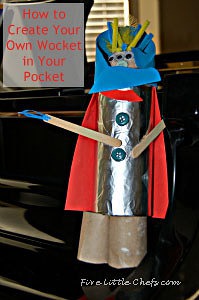
Dr Seuss Craft – “There’s a Wocket in my Pocket”
Dr Seuss Day is this Saturday! My Little Chefs LOVE Dr Seuss books. We celebrate each year with fun crafts, treats, and read our favorite books. One of our favorite books is There's a Wocket in My Pocket! And who doesn't just love this book of ridiculous rhymes! Strange creatures with even stranger names, living on ordinary pieces of furniture and areas around a little boy's home.
After reading this book, my Little Chefs decided they wanted to create their very own strange creature! They ...
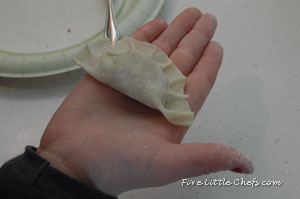
Japanese Gyoza – Our staycation through food
Gyoza is a food my Little Chefs know pretty well. They love talking about places they want to go visit. When I was young we would make Gyoza every so often. I remember it taking a LONG time to make. We had many hands in the kitchen helping, but it still took forever. In our old neighborhood our next door neighbor made these as a family and then sold them to help pay for their kids activities. We would buy some which they made and froze so that we could have them whenever we wanted. That is ...
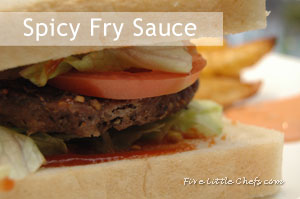
Spicy Fry Sauce. Great to dip or sauce your bun!
Fry Sauce is something we love to make with one of our quick go to meals; hamburgers and homemade steak fries. This time we thought we could kick up the flavor and add some spice! What is nice about this recipe is that if you want to make the ketchup part and stop there you can. If you want to keep going and make the Spicy Fry Sauce you can do that as well. So, in essence this is two recipes in one!
This recipe is easy for any Little Chef to complete. It is quick which means even the ...
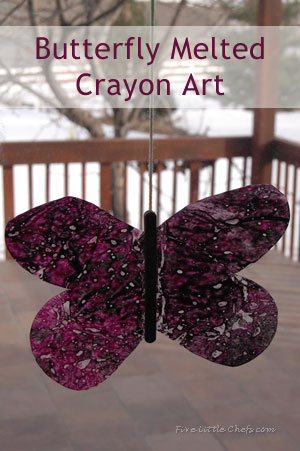
Butterfly Melted Crayon Art
What do you do with all your broken crayon pieces? We make crayon melting art. It is an easy craft that is fun to do for a family night or when friends come to play.
It seems every time my Little Chefs get out the box of crayons they are not fully picked up and either I step on one and break it in two, or Little Chef H thinks it is fun to break the crayons in two. She thinks she is so strong to be able to do this! I have a hard time throwing them out because I know there HAS to be ...
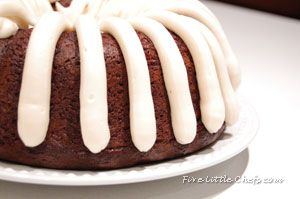
Chocolate Cake Anyone…..?!
Yes please!!! And what recipe do you ask is our favorite chocolate cake recipe? It is the "Our Version of Nothing Bundt Chocolate Chip Cake" from the cookbook Favorite Family Recipes. It is simply delicious, and simply......simple!!
We first added the cake mix, chocolate pudding, sour cream, eggs, water and oil and beat till well combined. My Little Chef B is so proud of himself that he is now able to crack and add the eggs with no help (and no shells)!
We stirred in ...
Sponsored Post: Glade Expressions
I am a Bzz Agent. I was given the opportunity to try out and review the Glade Expressions® Collection - both the Glade Expressions® Fragrance Mist and the Glade Expressions® Oil Diffuser. I really liked the Oil Diffuser because of the look and how long the scent lasted; just over a month. I tried the Lavender & Juniper Berry. The funny thing is Little Chef D and H helped me pick out the scents. Actually they didn't let me choose, they chose! At home they helped me open the package ...
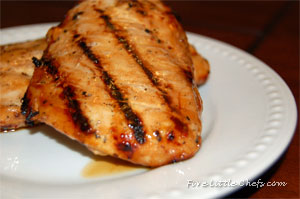
Grilling on the BBQ in the Winter…..Sure Why Not!
We thought we would mix things up a bit and make a dish that is usually prepared for summer barbeques in the WINTER! And yes, we broke out the BBQ Grill in the winter, with snow on the ground! My Little Chefs thought it was so much fun.
We came across this delicious Chicken recipe when a good neighbor of mine brought us dinner one night. Our Chef Dad was out-of-town for work, and she knew that when he is out-of-town, us Chefs take a break from the kitchen and pretty much eat cereal for ...
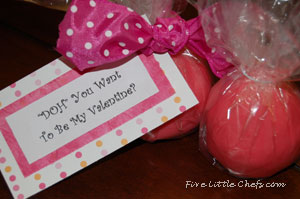
“DOH” You you want to be my Valentine?
With all the candy around at Valentine's Day (and don't get us wrong, we LOVE conversation hearts and cinnamon bears) we try to give a little more love than just candy. This year we decided to give a homemade playdough Valentine gift to all the Little Chef's friends.
This playdough recipe we created by combining a couple different recipes. We LOVE this recipe because it is so smooth and not crumbly, it will last forever (I think I just threw away a batch from last October!), and the ...
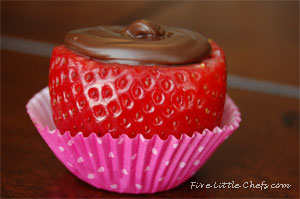
Chocolate Filled Strawberries
For Valentine's Day we have a yummy tradition that the Little Chefs help make, EAT and share chocolate covered strawberries. This year, however, we decided to mix things up a bit and try a new take on the delicious chocolate dipped strawberry....to turn it inside out and have the chocolate on the inside, Chocolate Filled Strawberries! We thought of this idea after making our Cream Filled Strawberries.
We first had to think of a way to get the strawberries to stand up, and to be able to ...
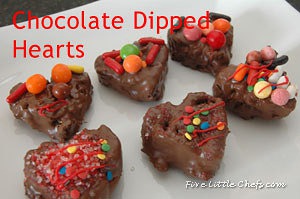
Chocolate Dipped Hearts
Celebrating holiday's is so much fun! My Little Chefs wanted to make something that they could be creative with. We decided to make rice krispie treats, dip them in chocolate and then decorate them in their own way.
The first step is to make rice krispie treats in a jelly roll pan because we didn't want them to be too thick. One trick we have is when pressing the rice krispie treats into the jelly roll pan place a piece of wax paper over the top and press on that. Using a heart cookie cutter ...
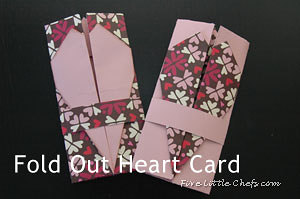
Fold-Out Heart Card
We have been having fun with origami and paper lately. Some attempts have been successful, while others have failed miserably. If I can't figure out the directions to teach it to my Little Chefs quickly they get bored and distracted and move on to something else. This fold-out heart card was one of our successful attempts. It was also fun because Little Chef C was immediately able to write a valentine for Grandma and Grandpa. Not only was she able to show them her creative work, but she was ...